RESTful API에 Docker Mysql 컨테이너와 Mybatis 연동
RESTful API에 Docker Mysql 컨테이너와 Mybatis 연동
RESTful API - Docker의 Mysql과 Mybatis 연동

Docker#
Docker에 Mysql을 올리는 것은 저번 포스팅에서 진행하였기 때문에 도커에 Mysql 올리기 링크를 남기고 다음부터 진행합니다.
지난 포스트에서 생성한 Docker의 Mysql 컨테이너를 실행
- docker ps -a (“컨테이너 조회”)
- docker start
(“컨테이너 시작”)
- docker restart
(“컨테이너에 재시작하기”) - docker stop
(“컨테이너에 종료하기”) - docker attach
(“현재 실행중인 컨테이너에 접속하기”)
- sudo docker exec -it
/bin/bash (“컨테이너의 CLI 접속”)
PS C:\WINDOWS\system32> docker ps -a
CONTAINER ID   IMAGE       COMMAND                  CREATED      STATUS                    PORTS                                       NAMES
4b6fb99160bf   mysql:5.6   "docker-entrypoint.s…"   9 days ago   Exited (255) 2 days ago   0.0.0.0:9876->3306/tcp, :::9876->3306/tcp   test_mysql
PS C:\WINDOWS\system32> docker start test_mysql
test_mysql
PS C:\WINDOWS\system32> sudo docker exec -it test_mysql /bin/bash

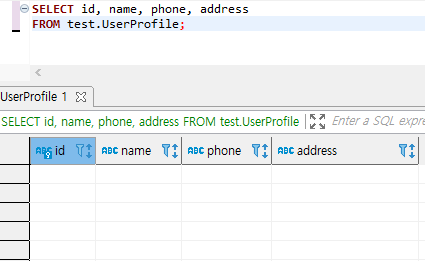
DBeaver 연결 및 테이블 생성#
지난 포스트 Mysql DBeaver 설치 참조
UserProfile table 생성
-- test.UserProfile definition

CREATE TABLE `UserProfile` (
  `id` varchar(64) NOT NULL DEFAULT '',
  `name` varchar(64) DEFAULT NULL,
  `phone` varchar(64) DEFAULT NULL,
  `address` varchar(256) DEFAULT NULL,
  PRIMARY KEY (`id`)
) ENGINE=InnoDB DEFAULT CHARSET=latin1;
Dependency 추가#
Dependency란 ?#
자바 프로젝트 관리 도구인 아파치 메이븐의 XML형태의 라이브러리(의존성) 정의이며, Spring에서 Pom.xml에 추가하는 것을 의존성 주입이라 하며, Pom.xml에 xml 형식으로 추가하면 Maven Repositoy에서 라이브러리 파일을 자동으로 받아준다.


pom.xml에 MysqlJ Dependency 추가#
pom.xml은 /demo/pom.xml 프로젝트 최상단에서 찾아볼수 있습니다. SpringBoot에 Mysql과 Mybatis를 추가하기 위하여 pom.xml에 해당 dependency를 추가할 것입니다.

pom.xml은 아래와 같은 구조로 되어있으며, dependencies 밑의 dependency들 처럼 mysqlj와 mybatis를 추가하면 됩니다.

Maven Repositiry#
dependency를 추가하기 위하여 Maven Repositiry를 접속합니다.
MysqlJ (Mysql Connector for Java)#
mysql connector를 받기 위하여 mysql j 를 검색합니다. mysqlj는 Mysql을 위한 JDBC 입니다.


Maven dependency xml 소스를 복사합니다.

pom.xml에 붙여넣고

Mysql Connector의 버전을 제거합니다. Spring Boot에서는 자주 사용하는 라이브러리에 한해서 SpringBoot 버전과 가장 호환이 잘되는 버전으로 빌드를 해주는 기능이 있기 때문에 버전은 제거해둡니다. 버전을 남겨두면 버전에 따라 waring이 뜰 수 있습니다.
pom.xml에 Mybatis Dependency 추가#
Mybatis#
mybatis를 검색하고 Mybatis Spring Boot Starter를 선택합니다. 마이바티스(MyBatis)는 자바 퍼시스턴스 프레임워크의 하나로 XML 서술자나 애너테이션(annotation)을 사용하여 저장 프로시저나 SQL 문으로 객체들을 연결시키는데 도움을 줍니다.


마찬가지로 Mybatis Maven dependency xml pom.xml에 붙여넣습니다.

application.properties 설정#
/demo/src/main/resources/application.properties 파일을 수정합니다.
application.properties 파일에 Mysql 접속 정보를 추가합니다.

spring.datasource.url = jdbc:mysql://localhost:[port]/test?useUnicode=true&characterEncoding=utf8&serverTimezone=Asia/Seoul&useSSL=false

spring.datasource.username = [userId]

spring.datasource.password = [password]
프로젝트 우클릭 > Maven > Update Poject를 통하여 추가한 라이브러리들을 받습니다.

UserProfile 테이블 생성#
기존에 만들었던 com.example.demo.model.UserProfile의 필드들을 토대로 UserProfile 테이블을 생성합니다.
UserProfile.java#
package com.example.demo.model;

public class UserProfile {
	private String id;
	private String name;
	private String phone;
	private String address;

	public UserProfile(String id, String name, String phone, String address) {
		super();
		this.id = id;
		this.name = name;
		this.phone = phone;
		this.address = address;
	}

	public String getId() {
		return id;
	}

	public void setId(String id) {
		this.id = id;
	}

	public String getName() {
		return name;
	}

	public void setName(String name) {
		this.name = name;
	}

	public String getPhone() {
		return phone;
	}

	public void setPhone(String phone) {
		this.phone = phone;
	}

	public String getAddress() {
		return address;
	}

	public void setAddress(String address) {
		this.address = address;
	}
 }
UserProfile 테이블 엔티티#
Id를 키로 잡고 나머지
UserProfile 테이블 생성쿼리#

CREATE TABLE `UserProfile` (
  `id` varchar(64) NOT NULL DEFAULT '',
  `name` varchar(64) DEFAULT NULL,
  `phone` varchar(64) DEFAULT NULL,
  `address` varchar(256) DEFAULT NULL,
  PRIMARY KEY (`id`)
) ENGINE=InnoDB DEFAULT CHARSET=utf8;
Mapper 생성#
Mapper#
Mybatis 매핑XML에 기재된 SQL을 호출하기 위한 인터페이스입니다. 스프링부트, mybatis 3.0이상에서는 Mapper를 통하여 SqlSession을 등록을 생략하고, DAO 인터페이스와 인터페이스 구현을 하지 않고 바로 SQL을 호출 할 수 있습니다. @mapper 어노테이션을 이용해 메서드명과 xml 파일의 id를 매핑시켜 편리하게 사용 할 수 있습니다.
UserProfileMapper.java 파일 생성#
/demo/src/main/java/com/example/demo/mapper 패키지를 생성합니다.


UserProfileMapper#
interface로 UserProfileMapper를 생성하고 @Mapper를 붙여서 스프링에서 Mapper로 인식하게 합니다.
UserProfileMapper 작성#

package com.example.demo.mapper;

import java.util.List;

import org.apache.ibatis.annotations.Mapper;
import org.apache.ibatis.annotations.Param;

import com.example.demo.model.UserProfile;

@Mapper
public interface UserProfileMapper {

}
getUserProfile 작성#
- @select를 사용하여 select 쿼리를 정의합니다
- Mybatis를 통하여 파라미터인 id와 ${id}를 매핑합니다.
	@Select("SELECT * FROM UserProfile WHERE id = ${id}")
	UserProfile getUserProfile(@Param("id") String id);
getUserProfileList 작성#
- @select를 사용하여 select 쿼리를 정의합니다.
	@Select("SELECT * FROM UserProfile")
	List<UserProfile> getUserProfileList();
putUserProfile 작성#
- @Insert를 사용하여 insert 쿼리를 정의합니다.
- Mybatis를 통하여 UserProfile 컬럼과 파라메터 ${param}를 매핑합니다.
	@Insert("INSERT INTO UserProfile VALUES(${id},${name},${phone},${address})")
	int putUserProfile( @Param("id") String id
			          , @Param("name") String name
			          , @Param("phone") String phone
			          , @Param("address") String address);
postUserProfile 작성#
- @Update를 사용하여 update 쿼리를 정의합니다.
- Mybatis를 통하여 UserProfile 컬럼과 파라메터 ${param}를 매핑합니다.
	@Update("UPDATE UserProfile SET name = ${name}, phone = ${phone}, address = ${address} WHERE id = ${id})")
	int postUserProfile( @Param("id") String id
			, @Param("name") String name
			, @Param("phone") String phone
			, @Param("address") String address);
deleteUserProfile 작성#
- @Delete를 사용하여 delete 쿼리를 정의합니다.
- Mybatis를 통하여 UserProfile 컬럼과 파라메터 ${param}를 매핑합니다.
	@Delete("DELETE UserProfile WHERE id = ${id}")
	int deleteUserProfile(@Param("id") String id);

UserProfileMapper.java#
package com.example.demo.mapper;

import java.util.List;

import org.apache.ibatis.annotations.Insert;
import org.apache.ibatis.annotations.Mapper;
import org.apache.ibatis.annotations.Param;
import org.apache.ibatis.annotations.Select;
import org.springframework.web.bind.annotation.PathVariable;

import com.example.demo.model.UserProfile;

@Mapper
public interface UserProfileMapper {

	@Select("SELECT * FROM UserProfile WHERE id = #{id}")
	UserProfile getUserProfile(@Param("id") String id);

	@Select("SELECT * FROM UserProfile")
	List<UserProfile> getUserProfileList();

	@Insert("INSERT INTO UserProfile VALUES(#{id},#{name},#{phone},#{address})")
	int putUserProfile( @Param("id") String id
			          , @Param("name") String name
			          , @Param("phone") String phone
			          , @Param("address") String address);

	@Update("UPDATE UserProfile SET name = #{name}, phone = #{phone}, address = #{address} WHERE id = #{id}")
	int postUserProfile( @Param("id") String id
			, @Param("name") String name
			, @Param("phone") String phone
			, @Param("address") String address);

	@Delete("DELETE FROM UserProfile WHERE id = #{id}")
	int deleteUserProfile(@Param("id") String id);

}
UserProfileController 수정#
UserMap을 만들어 메모리상에서 사용자 정보를 GET, POST, PUT, DELETE 하던것을 새롭게 추가한 UserProfileMapper를 사용하여 GET, POST, PUT, DELETE 하게 수정합니다.
UserProfileMapper를 파라미터로 전달받아 내부 참조변수에 저장하는 생성자를 만들면, SpringBoot가 알아서 Mapper 클래스를 만들어 객체를 UserProfileController를 생성하면서 생성자로 전달합니다.
이후 전달된 UserProfileMapper 클래스 객체를 통해 메서드를 사용할 수 있습니다.
UserProfileController.java#
package com.example.demo.controller;

import org.apache.catalina.User;
import org.springframework.beans.factory.annotation.Autowired;
import org.springframework.web.bind.annotation.DeleteMapping;
import org.springframework.web.bind.annotation.GetMapping;
import org.springframework.web.bind.annotation.PathVariable;
import org.springframework.web.bind.annotation.PostMapping;
import org.springframework.web.bind.annotation.PutMapping;
import org.springframework.web.bind.annotation.RequestMapping;
import org.springframework.web.bind.annotation.RequestParam;
import org.springframework.web.bind.annotation.RestController;

import com.example.demo.mapper.UserProfileMapper;
import com.example.demo.model.UserProfile;

import java.util.ArrayList;
import java.util.HashMap;
import java.util.List;
import java.util.Map;

import javax.annotation.PostConstruct;

@RestController
public class UserProfileController {

	private UserProfileMapper mapper;

	public UserProfileController(UserProfileMapper mapper) {
		this.mapper = mapper;
	}

	@GetMapping("/users/{id}")
	public UserProfile getUserProfile(@PathVariable("id") String id) {
		//return userMap.get(id);	//변경전
		return mapper.getUserProfile(id);
	}

	@GetMapping("/users/all")
	public List<UserProfile> getUserProfileList() {

		//return new ArrayList<UserProfile>(userMap.values()); //변경전
		return mapper.getUserProfileList();

	}

	@PutMapping("/users/{id}")
	public void putUserProfile(@PathVariable("id") String id
                                 , @RequestParam("name") String name
                                 , @RequestParam("phone") String phone
                                 , @RequestParam("address") String address) {

		int resultCnt = mapper.putUserProfile(id, name, phone, address);

	}

	@PostMapping("/users/{id}")
	public void postUserProfile(@PathVariable("id") String id
								, @RequestParam("name") String name
								, @RequestParam("phone") String phone
								, @RequestParam("address") String address) {

		int resultCnt = mapper.postUserProfile(id, name, phone, address);
	}

	@DeleteMapping("/users/{id}")
	public void deleteUserProfile(@PathVariable("id") String id) {

		int resultCnt = mapper.deleteUserProfile(id);

	}
}
테스트#
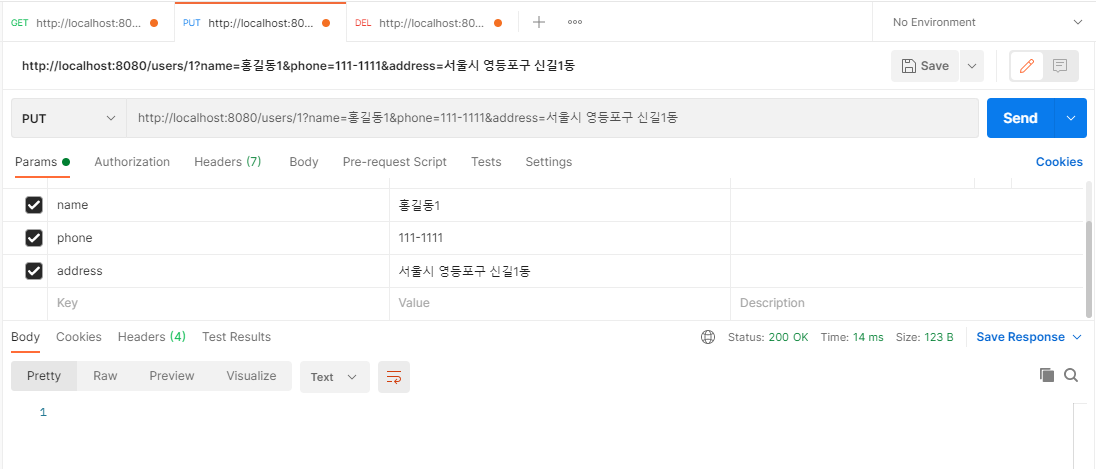
제일 먼저 PUT 을 통해서 사용자 1건을 추가합니다. HTTP Status 응답이 200인 것을 확인 할 수 있습니다.
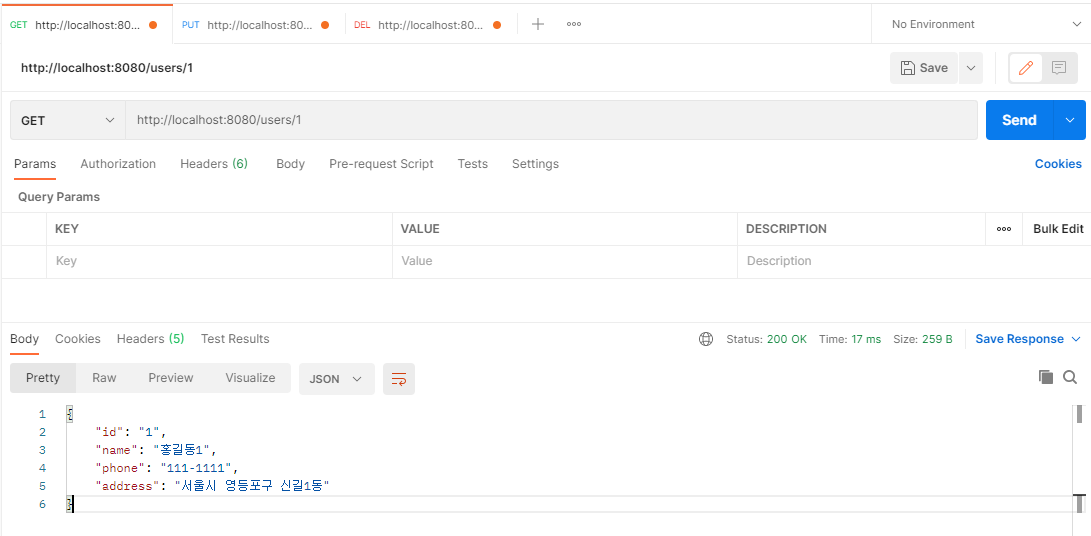
GET의 getUserProfile를 통해 사용자가 입력이 잘 되었는지 확인해 봅니다.
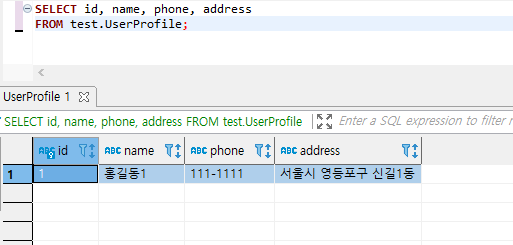
Mysql에 잘 저장되었는지 확인해 봅니다.
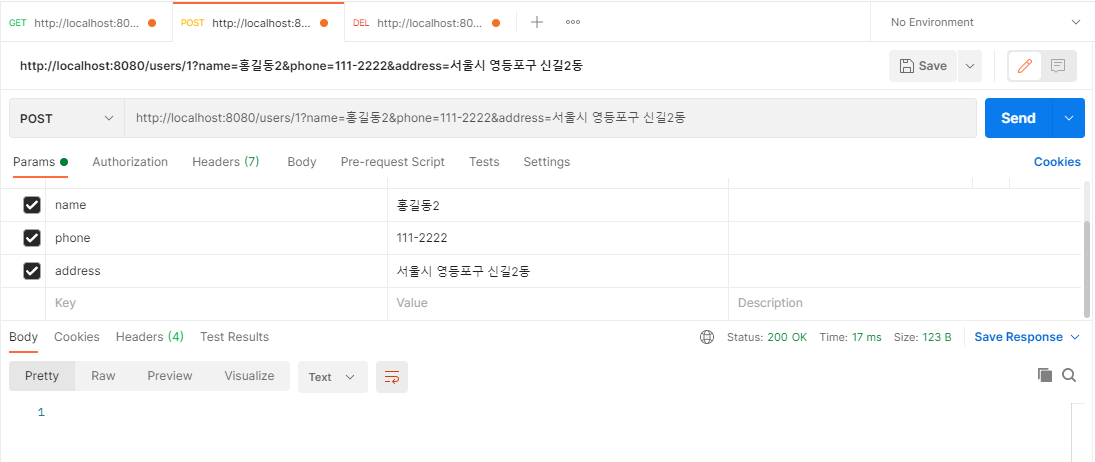
제일 먼저 POST를 통해서 입력한 사용자의 정보를 수정해 봅니다. HTTP Status 응답이 200인 것을 확인 할 수 있습니다.
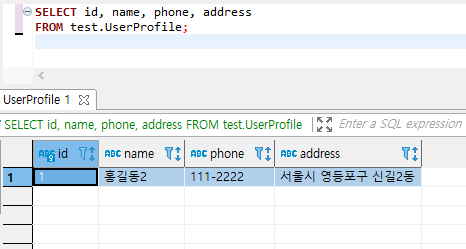
Mysql에서 잘 수정되었는지 확인해 봅니다.
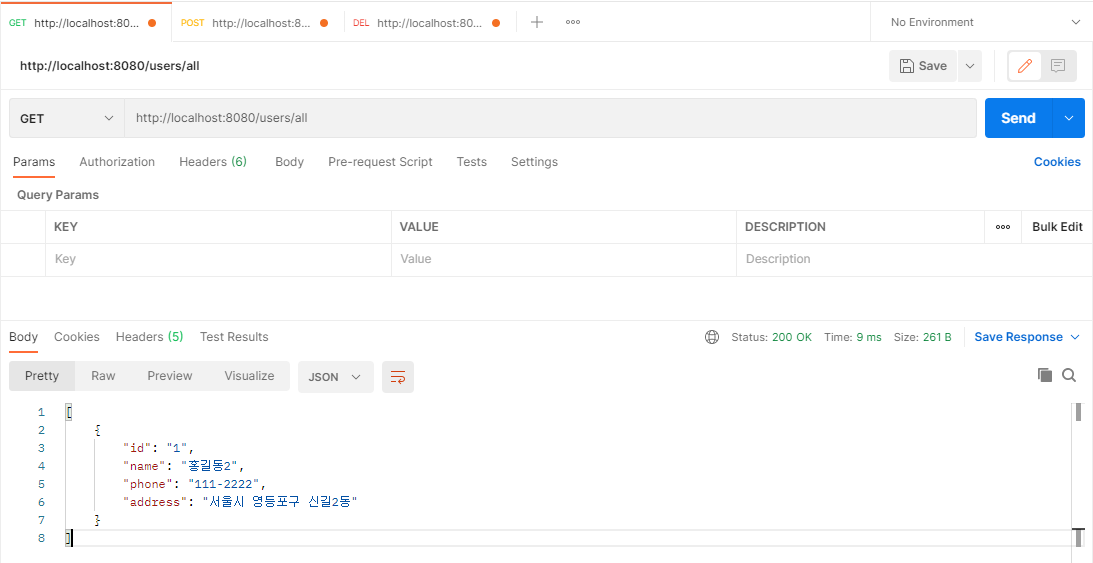
GET의 getUserProfileList를 통해 수정이된 내용을 확인해 봅니다.
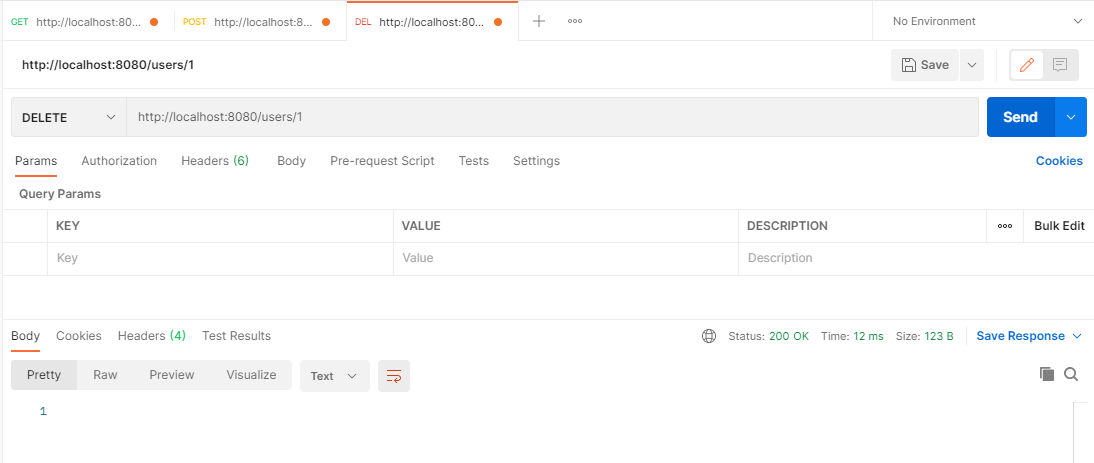
DELETE를 통하여 추가한 사용자를 삭제합니다. HTTP Status 응답이 200인 것을 확인 할 수 있습니다.
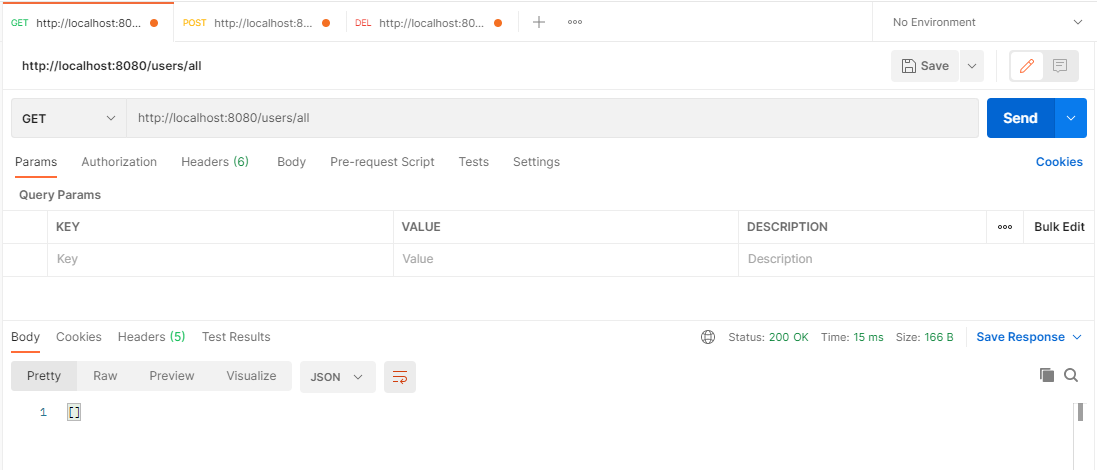
GET의 getUserProfileList를 통해 삭제된 내용을 확인해 봅니다.
Mysql에서 잘 삭제되었는지 확인해 봅니다.
